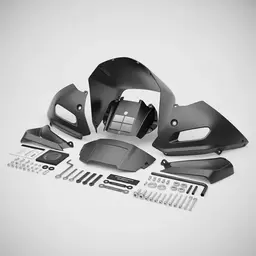
Motorcycle Fairing Work in St Kilda: Protecting Keys, Ignition Components, and Electronics During the Job
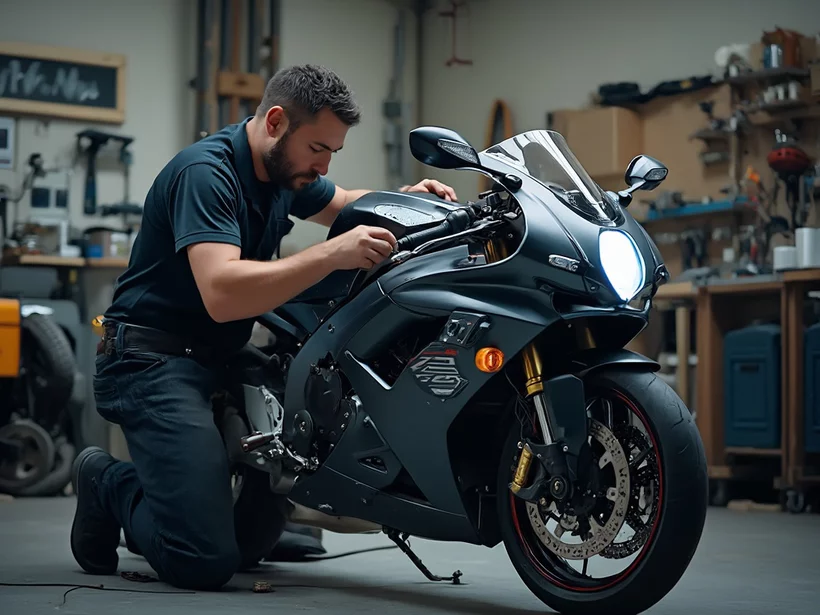
Motorcycle fairing work should protect more than the painted panels. A careful job also keeps the key, ignition switch, wiring harnesses, connectors, steering lock, and nearby electronics clear of avoidable damage.
Treat those components as part of the installation plan from the start. Store the key away from tools, identify wiring before moving panels, and check steering and ignition functions before the motorcycle leaves the work area.
If the job exposes a key, remote, or ignition issue, use a St Kilda motorcycle locksmith rather than forcing the lock. A stiff key, damaged barrel, failed remote, or steering-lock problem is a separate fault from fairing alignment and should be diagnosed that way.
Why Fairing Work Can Affect Keys, Ignition Parts, and Electronics
Modern motorcycle bodywork often sits close to components that have nothing to do with the fairing itself. Depending on the model, the front and side panels may surround the headlamp loom, instrument wiring, switchgear connectors, ignition harness, accessory wiring, fuse locations, or battery access points.
That makes panel removal more than a cosmetic task. A fairing can fit correctly while a cable is trapped behind it. A connector can appear seated while its wiring is stretched at full steering lock. A key can turn normally before the job, then bind because the ignition surround or nearby trim has been refitted under pressure.
The safest approach is to separate four jobs:
-
Remove and refit the fairing without damaging tabs, grommets, clips, paint, or fasteners.
-
Protect electrical wiring and connectors that become exposed.
-
Keep the key, remote, and ignition components free from tool damage or forced movement.
-
Test the motorcycle before the final ride, not after a problem appears on the road.
Ozzy Motorcycle Fairings already covers the broader St Kilda fairing installation process, including alignment, tools, and avoiding over-tightened fasteners. The additional checks below focus on the electrical and access components that deserve their own workflow.
Start With a Model-Specific Removal Plan
Before loosening a panel, identify how that panel is actually retained. Motorcycle fairings may use bolts, screws, push clips, rubber well nuts, grommets, locating tabs, hidden hooks, or combinations of several fastener types.
Do not assume that resistance means a panel needs more force. It may mean one fastener is still installed, a tab must move in a specific direction, or an electrical connector is still attached behind the panel.
Use the motorcycle's owner or service manual where available. Photograph each exposed area before disconnecting anything. Include clear images of:
-
connector positions
-
harness routing
-
cable ties and clips
-
rubber grommets
-
bracket orientation
-
fastener lengths and locations
-
wiring near the steering head
-
ignition-switch wiring if visible
Bag and label removed hardware by panel. Mixing a long fastener with a short one can create more than a cosmetic problem if the longer screw reaches wiring or another component behind the panel.
If you are choosing replacement hardware or a complete kit, Ozzy's guide to motorcycle fairing installation kits in Australia is a useful companion reference for kit selection and installation planning.
Keep the Key and Remote Out of the Work Zone
The ignition key should not live in the tool tray while panels are being removed. Put it in a clean, fixed location away from sockets, screws, adhesives, cutting tools, heat, liquids, and loose hardware.
This simple habit solves several problems. It prevents the key blade from being bent under parts. It stops a remote housing from being scratched or crushed. It also reduces the chance of someone switching the ignition on while connectors are disconnected.
Keyless motorcycles need another consideration. A proximity fob can remain active even when it is not physically inserted into the motorcycle. If the manufacturer's procedure calls for the fob to be removed from the bike's proximity during maintenance, follow that instruction.
An official 2026 Indian Motorcycle battery procedure tells technicians to turn the ignition off, remove the key, and move a keyless fob away from the vehicle before battery work. The same procedure also calls for the negative battery cable to be disconnected first. See the official battery removal procedure for the model-specific example.
Do not generalise one manufacturer's sequence to every motorcycle. Use it as a reminder that key position, fob location, battery order, and reconnection checks can be specified by the manufacturer.
Disconnect Power Only When the Job Requires It
Not every fairing job requires battery disconnection. A simple outer panel replacement may not involve an electrical connector at all. Unnecessary battery removal can create its own problems, including lost settings or extra work on motorcycles with security systems and electronic accessories.
Disconnect power when the model-specific procedure requires it, or when the job involves electrical connectors, exposed power circuits, accessory wiring, or components that should not remain energised during removal.
Before touching the battery:
-
switch the ignition fully off
-
remove the key
-
move a keyless fob away if the manufacturer requires it
-
identify the correct battery access procedure
-
confirm whether stored settings or security functions need attention
-
use insulated, correctly sized tools
-
follow the specified terminal order
Indian Motorcycle's general battery guidance states that the negative cable should be removed first and installed last. It also warns that reversed battery leads can damage the electronic control unit. That is a useful example of why battery work should follow the motorcycle's manual rather than a generic shortcut.
Once power is isolated, keep the disconnected lead clear of the terminal. Do not leave a loose cable where panel movement can push it back into contact.
Protect the Wiring Harness While the Fairings Are Off
Removing bodywork creates access, but it also removes the physical support and routing boundaries that help keep a wiring harness in place.
Do not let exposed wiring hang by a connector. Support the loom so the weight sits on the harness, not on individual terminals. Avoid pulling a connector apart by its wires. Use the connector body and release mechanism.
Inspect the routing before moving anything. Look for:
-
factory clips
-
rubber guides
-
loom sleeves
-
abrasion protection
-
cable ties
-
branch points
-
steering-head clearance
-
connectors attached to fairing brackets
-
wires passing close to sharp panel edges
The goal is not to reroute the motorcycle unless the job requires it. The goal is to return the harness to its original path without new tension, twists, pinch points, or contact with moving parts.
Ozzy's DIY wiring and accessory integration guide covers related wiring considerations such as connector protection and planning a clean route. For fairing work around the ignition area, add one more test: confirm the loom has enough free movement as the handlebars turn fully left and right.
Do Not Use the Fairing to Hold Wiring in Place
A common assembly error is allowing a panel to become an accidental cable clamp. The fairing should not be what keeps the headlamp loom, ignition wire, accessory lead, or connector from moving.
Before tightening a panel, look behind it with a torch. Trace the edge of the panel and every bracket it meets. A wire should not cross a screw boss, sharp bracket edge, mounting stud, or area where two panels overlap.
Pay particular attention near the steering head. Wiring in this area moves every time the bars turn. A harness that looks relaxed with the wheel straight ahead may become tight at full lock.
With the front wheel off the ground only if your workshop setup and manufacturer procedure permit it, or with the bike securely supported on the ground, slowly turn the handlebars from lock to lock. Watch the harness rather than the fairing.
Stop if you see a loom become taut, a connector lift, a cable rub a sharp edge, or a panel move because the wiring is pushing against it.
Do this before the final fasteners are tightened. Correcting routing is easier while the panel still has movement.
Inspect the Ignition Area Before Final Assembly
The ignition switch or key barrel can sit close to upper fairings, tank covers, dash trims, steering-head wiring, or accessory brackets. Fairing work should not change how the key enters, turns, or releases.
Before the final panel goes on, check the physical area around the ignition. Look for trim that is sitting crooked, a bracket that has shifted, wiring that now presses against the switch body, or an accessory that limits access to the key.
Do not spray lubricant into an ignition barrel simply because the key feels different after panel work. A new symptom immediately after reassembly may come from panel pressure, bracket movement, a bent key, debris, or an electrical fault rather than lack of lubrication.
Do not grip the key with pliers to gain more turning force. Do not strike the key. Do not force the steering lock through resistance.
If a normal key no longer turns as it did before the job, stop and identify what changed.
Check Steering-Lock Operation Without Forcing It
The steering lock deserves a separate check because fairing work can involve parts close to the steering head.
Test it only while the motorcycle is stationary and supported. Follow the motorcycle's normal steering-lock procedure. The handlebars should reach the required lock position without a fairing, cable, brake line, or wiring harness blocking movement.
Watch for three different symptoms:
The handlebars do not reach full lock
A panel, bracket, accessory, cable, or harness may be interfering with steering travel. Do not accept reduced steering movement as a cosmetic trade-off.
The bars reach lock but the key resists
Return the steering slightly toward centre and try the normal procedure again. Steering locks can carry load when the front end is pressed against the stop. Persistent resistance needs diagnosis.
The lock works but wiring becomes tight
The electrical routing is wrong even if the mechanical lock engages. Reopen the relevant panel and correct the harness path.
This test separates a fitment problem from a key or lock problem. That distinction matters because forcing a lock can turn a small assembly issue into a damaged key or ignition component.
Refit Panels in Stages, Not All at Once
Do not fully tighten every fairing fastener the moment it enters its hole. Start the fasteners by hand and leave controlled movement until the adjoining panels, tabs, grommets, and brackets are correctly seated.
This lets the assembly settle into position without using bolt tension to pull misaligned plastic into place.
A practical sequence is:
-
Position the main panel.
-
Engage locating tabs and grommets.
-
Start the major fasteners by hand.
-
Connect any required electrical plugs.
-
Check wiring clearance behind the panel.
-
Fit adjoining panels.
-
Check gaps and alignment.
-
Turn the handlebars through their full available movement.
-
Tighten fasteners to the model-specific specification.
-
Repeat the electrical and steering checks.
Do not use a powered driver for final tightening unless the manufacturer's procedure specifically permits it and you can control torque accurately. Fairing plastics and rubber-mounted points need the correct fastener tension, not maximum tightness.
Reconnect and Test Electronics Before the Ride Home
Once the fairing is physically installed, test every function that may have been touched or routed through the work area.
The exact list depends on the motorcycle, but it can include:
-
ignition on and off
-
starter operation
-
instrument display
-
headlamp
-
high and low beam
-
front indicators
-
hazard lights
-
horn
-
accessory sockets
-
USB power
-
heated grips
-
aftermarket lighting
-
security or immobiliser indication
-
keyless start recognition
Do this while the motorcycle is stationary.
If a function fails, do not assume the new fairing caused an electronic fault. Start with the parts you actually handled. Check the relevant connector, fuse, ground, wiring route, and battery connection against the model's documentation.
If the ignition powers up but the starter does not behave normally, stop the test. Repeated attempts can hide the original symptom and drain the battery.
A fault that appeared immediately after wiring was disturbed should be diagnosed before the panels are considered finished.
Check the Fairing Again With the Engine Running
A static inspection cannot reveal every fit problem. Once the electrical checks are complete and it is safe to start the motorcycle, listen and watch with the engine idling.
Look for vibration at panel joins, headlamp surrounds, brackets, and windscreens. A connector or wire touching a panel can create a buzz that sounds like loose plastic.
Do not reach into moving or hot components while the engine runs. If you hear an unexplained rattle, switch the motorcycle off before investigating.
Also check that the instrument panel remains readable and no newly positioned trim obstructs warning lights or switches.
For riders who have also refreshed painted or replacement panels, Ozzy's guide to UV protection and paint maintenance for motorcycle fairings covers the cosmetic care that starts after the mechanical and electrical work is finished.
Use a Pre-Ride Test Instead of Going Straight Into Traffic
The first movement after fairing work should be controlled. Do not finish the last screw and immediately join busy St Kilda traffic.
Before moving:
-
confirm the key can be removed and inserted normally
-
confirm the ignition operates normally
-
release the steering lock fully
-
turn the bars left and right
-
check throttle return
-
check front brake-line clearance
-
check clutch cable or hydraulic-line clearance
-
confirm mirrors are secure
-
confirm headlamp and indicators work
-
verify no tools or loose fasteners remain on the motorcycle
Victoria Police updated its motorcycle safety guidance in June 2026 and notes that a Roadworthy Certificate is not by itself a guarantee that a motorcycle is safe. Riders are told to ensure the bike has no dangerous or illegal damage or modifications. Review the Victoria Police motorcycle safety guidance before treating a completed cosmetic job as automatic confirmation that the motorcycle is ready for the road.
For the first test, choose a low-risk environment where you can stop quickly if a panel moves, a rattle appears, steering feels restricted, or an electrical fault returns.
Wear normal protective riding gear even for a short test. The Transport Accident Commission continues to stress protective gear on every ride, including short local trips.
Stop the Job When the Fault Is No Longer a Fairing Problem
DIY fairing work has a clear boundary. Stop once the problem moves into a system you are not equipped to diagnose.
Examples include:
-
the key is bent, cracked, or stuck
-
the ignition barrel binds after surrounding panels are released
-
a keyless remote is no longer recognised
-
the immobiliser indication is abnormal
-
steering lock will not engage or release normally
-
a damaged connector needs terminal repair
-
wiring insulation is cut or melted
-
a fuse fails again after replacement
-
the motorcycle loses electrical power intermittently
-
steering movement pulls on the harness
-
the ignition switch mount is loose or damaged
Do not solve these symptoms by cutting the fairing, forcing the key, bypassing security components, or adding random wiring.
A fairing specialist, motorcycle technician, auto electrician, and motorcycle locksmith solve different problems. Use the specialist whose work matches the fault.
A Practical Fairing-Work Checklist for St Kilda Riders
Use this sequence before, during, and after the job.
Before removal
-
Confirm the fairing kit matches the exact motorcycle model and year.
-
Read the model-specific panel removal procedure.
-
Photograph wiring, brackets, and connectors.
-
Label fasteners by panel.
-
Store the key and remote away from the workbench.
-
Decide whether the job actually requires battery disconnection.
While panels are off
-
Support exposed wiring.
-
Release connectors by their housings, not their wires.
-
Keep harnesses away from sharp edges.
-
Inspect ignition-area brackets and wiring.
-
Keep the key out of the ignition unless a specific test requires it.
-
Do not alter factory wiring routes without a reason and a documented plan.
During refitting
-
Seat tabs and grommets before tightening.
-
Start fasteners by hand.
-
Check behind each panel for trapped wiring.
-
Confirm harness slack at full steering movement.
-
Test the ignition and steering lock before final tightening.
-
Use the specified fastener torque where the manual provides it.
Before riding
-
Complete the electrical-function check.
-
Confirm the key and remote work normally.
-
Check steering movement and steering-lock release.
-
Confirm controls and cables move freely.
-
Listen for loose panels with the engine running.
-
Take the first ride in a low-risk area.
-
Stop immediately if steering, ignition, or electrical behaviour changes.
Finish the Job by Testing Systems, Not Just Panel Gaps
Good motorcycle fairing work ends when the motorcycle functions normally with the new or refitted bodywork in place. Panel alignment matters, but so do the systems hidden behind the plastic.
Keep the key away from the work area, follow the motorcycle's electrical procedure, protect harness routing, and test the ignition and steering lock before the ride home. If you are planning another installation, keep Ozzy's DIY wiring and accessory integration guide beside the model-specific service information so the electrical checks happen as part of the job rather than after it.